Wednesday, September 29, 2010

Mushroom season part 2


There exist a lot of quick-to-prepare dishes, which are so delicious despite their total simplicity. Two, or three ingredients of good quality and we are in a culinary heaven.

What are your favorite, simple and quick dishes (or accompaniments?) made out of two or three ingredients, which you love, and you like to come back to? Share with us!

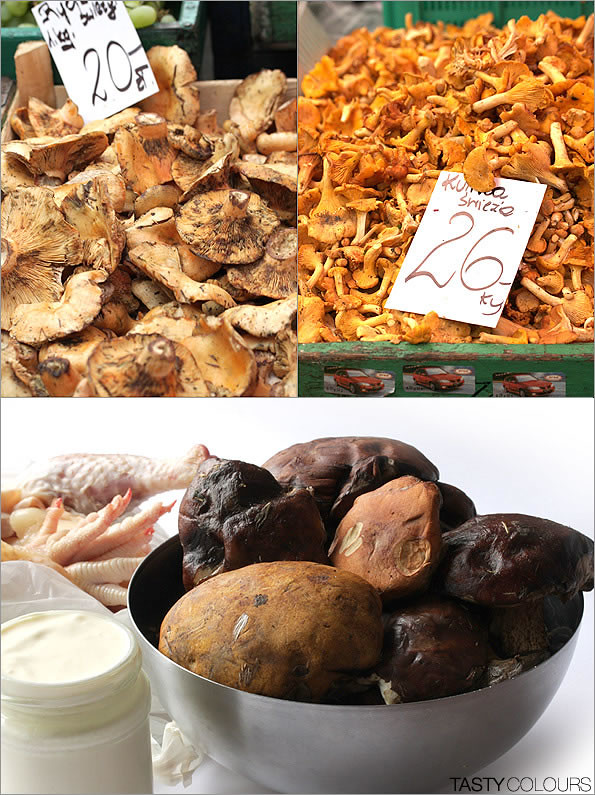
Fried Lactarius Delicious mushrooms (or saffron milk caps, red pine mushrooms, in Polish - "rydze") is that type of delicacies.

To prepare this very seasonal Polish hot starter, you need only two ingredients – some nice, fresh mushrooms and a lot of butter (without counting salt and pepper). And a large frying pan also, so the mushrooms can fry evenly. 

Those carrot colour - sometimes slightly red - mushrooms are not as easy to buy as ceps, chanterelles or boletus badius, but still, they are popular in Poland (it is quite easy to find them, particularly in the south of the country). They are still quite cheap on the Kleparz market in Krakow (around 5 euro per kg), as in the south of the country we have a lot of pine forests – the tree, under which those mushrooms like to grow the most.
One can find them across Europe and North America.  Last year, I saw them in La Grande Epicerie de Paris, but the price was prohibitive and nobody was buying them.

Pine mushrooms are best when fried, grilled or pickled (how to pickle forest mushrooms, check here). This is how they traditionally are served in my country. I also used fried lactarius for the stuffing of my pierogi. Two people who tasted them confirmed that they are good enough to be shown on the blog – so check out my next post!

In Poland, we are used to dry forest mushrooms and we use them out of the season for the preparation of many dishes.  However, pine mushrooms are not suitable for drying out, as opposed to boletus or ceps. Avoid adding them into soups because they are not suitable for boiling. Just grilling or frying them releases their taste. Their flat and wide caps are ideal for this type of preparation. The taste is a bit nutty, particular. Use clarified butter in this recipe, which has higher smoke point than regular butter, to prevent the ingredients from burning.

Pine Mushrooms Fried in Butter 
Ingredients:
Serves 2 as a starter
300 g fresh pine mushrooms
60 g butter
Salt
Pepper

1. Delicately clean mushrooms from leftovers of the forest. Scratch the stems to remove soil. Rinse the mushrooms delicately under cold water. Separate stipes (mushroom stalks) from caps.

2. In a saucepan, slowly melt butter over minimum heat (do not stir). Remove from heat and skim the foam off the surface. Spoon the butter into a bowl. Discard the milky sediment.

3. In a hot large frying pan, heat butter, add mushrooms (they should not be crowded, so they can grill evenly) and fry them on each side for about 4 to 7 minutes, until nicely grilled (depending on the thickness their caps) and until they release their juices and absorb them back in (when frying over high heat, they should not release a lot of juice). Salt and pepper and serve immediately with slices of country bread.

Bon appétit!

Friday, September 24, 2010

A Season for Forest Mushrooms


I mentioned in my first posts (for example, in the post about pickled ceps) that the flavor of forest mushrooms, both dried or fresh, is an essential ingredient of Polish cooking and this is one of my favorite ingredients in the kitchen. I already wrote about pickled ceps, Zrazy and potato pancakes with chanterelle sauce.

We are in the middle of the forest mushroom season here in Poland, so I could not hesitate to present some of our Polish style seasonal mushroom specialties. Poland is still relatively rich with forests and one can quite easily find in them edible and non edible mushrooms. This is also due to the quite humid climate. When I was a kid, we were spending each holiday in the mountains, and we dedicated a lot of time to “mushroom escapades”. Nowadays, when I visit Kraków, I buy them on local food markets, in particular on Kleparz – my favorite food market in town.
There are sellers who have a license for selling forest mushrooms. Remember that some of the poisoning ones may resemble some those edible ones. I know a bit about mushrooms, but besides the cèpes family and chanterelles, I do not buy any other types of forest mushrooms from individuals who do not have a sales permit.

A lot of people practice mushroom hunting in forests, and each year the media report some traumatic news about some adults and children (who would gives forest mushrooms to young children?!) being killed or heavily sick after eating, for example, a death cap (Amanita phalloides - in Polish "muchomor sromotnikowy"), taken by mistake for a parasol mushroom (Macrolepiota procera - in Polish "kania") (by the way, parasol mushrooms are delicious especially grilled).

So, if you ever visit Poland during the mushroom season, eat them and enjoy them, but buy them in places where they are thoroughly checked. For that part, restaurants are safe.

Let’s start this mushroom season with a Polish style soup, which is one of my favorites in that time of the year.
I used homemade, rich chicken broth for it, but feel free to use any other type of broth. This time, I blended part of the mushrooms as I wanted my soup to be a bit thicker than usual. I used Boletus badius (in Polish - "podgrzybek brunatny"), which is very popular in Poland (although some chefs do not appreciate them), and Leccinum (in Polish - "kozak", "koźlarz"; growing in Europe and in North America) - both from the boletus family. You can use cèpes, of course, but they are much more expensive.


Polish Style Forest Mushroom Soup 


Ingredients
Serves 4-6
500 g boletus badius
500 g leccinum mushrooms
1 onion, peeled and finely chopped
1.5 l homemade chicken broth
4 tablespoons clarified butter
100 ml heavy cream
Fresh chopped dill or parsley for sprinkling
Salt
Pepper

Delicately clean mushrooms from leftovers of the forest. Scratch the stems to remove soil. Rinse the mushrooms delicately under cold water. Separate bigger stipes (mushroom stalks) from caps. Cut caps into thin slices. Put the stalks aside.
In a hot frying pan, heat butter, add onions and fry over medium heat around 10 minutes, mixing often. Do not let the onions burn. Add mushroom caps in the frying pan and sauté them until they release their juices and absorb them back in. Salt and pepper and put aside.
In a large saucepan, heat the chicken broth, add mushroom stalks and cook for about 15 minutes, until the mushrooms are completely soft. Strain the broth, reserve it, but discard stalks (you can use the stalks for the soup if you like, but stalks of my big mushrooms were spongy and soft this time).

Add mushroom caps with onions into the broth. Cook for another 10 minutes, until the juices mix well. Pour one half of the soup into a blender and reduce it to purée and add it back to the remaining half of the soup (you should still see mushroom pieces in the soup). Pour a bit of the soup into a cup, add cream, mix well and add to the soup. Adjust the seasoning with salt and pepper, if necessary, and serve hot, sprinkled with fresh, chopped herbs (I used Polish dill).

The soup goes very well with noodles.

And finally to close this post: some time ago I was invited by Polish bloggers to list 10 things that I like, so let’s go for it! Thanks a lot guys for your invitation!

  • Swimming relaxes me and in the summer time I try to swim as much as possible, meaning a few times per week;
  • I like to watch documentaries and read reportages, in particular shot in other parts of the World;
  • Taking long walks releases my mind;
  • Showing the World to our daughter makes me happy;
  • I like to cook with my husband;
  • Laying down with a book at the end of the day is what I also like;
  • To be close to nature, to just watch it and think about nothing;
  • I love to drive a car and travel by train, in particular on long distances;
  • I like to listen to the music, although my music taste has changed over the years (I am getting older);
  • I like to work on things that I like.

Saturday, September 11, 2010

Home Made Veal Stock

In June, I presented the dish “Pierogi with Lamb”, for which I used my homemade veal stock reduced to demi - glace.
Stocks are the foundation of classic French Haute Cuisine. The French name for stock is fond - meaning “foundation”.  There exist two types of stocks: white stocks and brown stocks. The first ones are prepared from bones of birds, fish or veal, which are simmered in water with vegetables and herbs. They are lighter than brown stock – the second type.  To obtain a brown stock, one should fry or roast the bones first.  Brown stocks may be made from veal, beef, poultry, lamb, pork, venison or even shells or shellfish. 
This post is about brown veal stock. We make it at home several times per year. Some say that we are the last generation to learn how to cook with veal bones. It is not easy to buy them these days. Even in France, the legislation may change in the coming years, so we will not be able to buy them anymore. Still, we can buy them quite easily in butcher shops in Paris, and in Kraków.

As I already mentioned in my post about Pierogi with Lamb and Morels, veal stock is a kind of preparation that it is difficult to make at home (because, for example, in some countries you will not get any veal bones in any store – in this case one can use beef bones) and those industrial powdered stocks are hopeless. Moreover, to prepare homemade veal stock (or any other stock) is an absolute messy job. Furthermore, the authentic, homemade veal stock itself may not be very interesting in taste – its pure taste is not so pleasant. But what is fascinating about it is that once you combine it with other flavors, like for example, meat juices, wild mushrooms, butter, cream, garlic or alcohol - it becomes something absolutely outstanding.

There are tons of veal stock recipes. Some people like to dust the bones with flour before roasting them, others (like us) prefer not to roast the vegetables, or to deglaze the roasting pan with wine. Some prefer to add vegetables just one hour before the end of cooking. Others like to add bouqet garni. Just feel free to choose your favorite options. The recipe that I present here was given to me by my husband who taught me how to make good, classical veal stock and demi-glace. The recipe comes from one of the French restaurants, which he had been working et when he was younger.

Once your veal stock is ready, you can play with it further and reduce it to about one third and make a more concentrated stock called demi-glace , or reduce it even more (as little as a tenth of its original volume) – to obtain a glace – a sticky reduction ideal to flavor your sauces. I know: those sauces made with veal stock are not very light; but they are delicious; moreover, we do not eat them every day.

You will find here some advices to prepare a good veal stock, that I collected from my husband and from Michael Booth’s book (which helped me to write this post). Please note another book that I recently found: “Le Cordon Bleu’s Complete Cooking Techniques”.

I recommend cooking your own veal stock at least once in your life. If you cannot buy fresh veal bones, try to cook beef stock, following these instructions and the recipe:

(i)  Use good bones (the fresher, the better), cut into small pieces;
(ii) Use fresh vegetables (“a stock made with garbage will taste like garbage” – Alice Walters – Chez Panisse) the so called “mirepoix” (combination of carrots, onions, celery and sometimes garlic and shallots);
(iii)  The mirepoix should not dominate the flavor of the stock, so do not use too much of it (maximum around 20 per cent the weight of mirepoix to bones);
(iv) You can add a bouqet garni (a mixture of laurel leaves and thyme, sometimes parsley stems as well); we do not add any, as we want to have a clear, blend stock, which we will use later for various sauces of different flavors;
(v)  We do not salt and pepper the stock, because it constitutes a base for sauces, which will be reduced and seasoned later; if you will salt the stock during simmering the risk is that you will waste your job because the salty taste will intensify after reduction;
(vi) It is important to simmer the stock for at least a few hours – a stock which will not be cooked enough, will be watery and without flavor; and on the contrary, a stock which will be overcooked may become bitter;
(vii) Do not use a nonstick frying pan or saucepan to roast the bones – you need a good “sticky” roasting-pan, so you can deglaze all goods that stuck to its surface while roasting the bones.

Ingredients:
3 to 4 kg good quality and fresh veal bones, cut into pieces by your butcher, rinsed under cold water and dried (you can replace veal bones by beef bones, but beef stock is not as good as veal stock, because veal bones have more gelatin so the sauce will look better)
4 big onions, washed from soil, dried (but not peeled!), cut into halves
2 small cans of tomato paste
2 to 3 stalks of celery, washed and chopped in thick slices
3 carrots, washed and cut into thick slices
1 large, thick-bottomed roasting pan
1 large saucepan of about 10 liter capacity (the best is a narrow and high saucepan to minimize evaporating during cooking)
1large strainer
1”chinois” or muslin

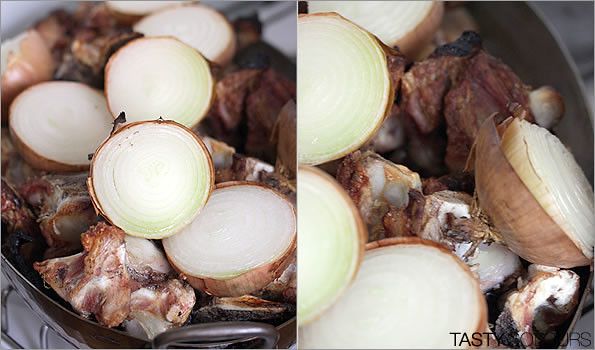
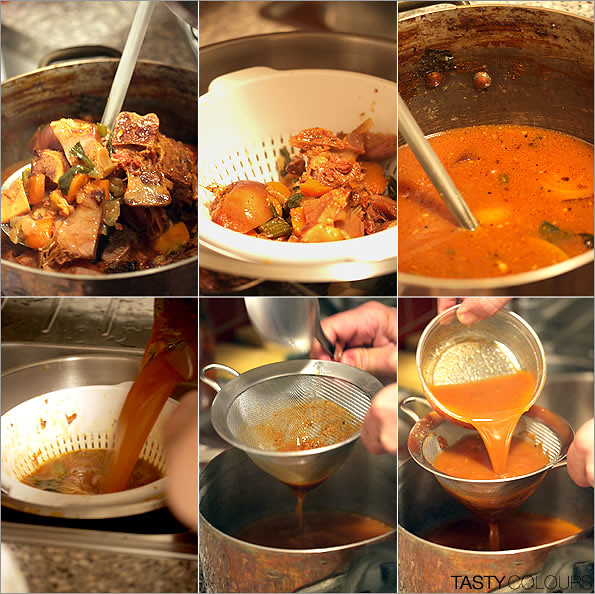
Heat the oven to 220° Celsius (430° Fahrenheit). Place the bones in the roasting pan and place the pan in the oven for about 1.15 to 1.5 hours. Be careful – the bones should brown evenly, and not burn. For that purpose, occasionally remove the roasting pan from the oven and flip the bones.


Once the bones are slightly gold (after about one hour), place onions on top of the bones. Roast everything another 15 to 20 minutes (you should really watch the onions and bones to prevent them from burning).


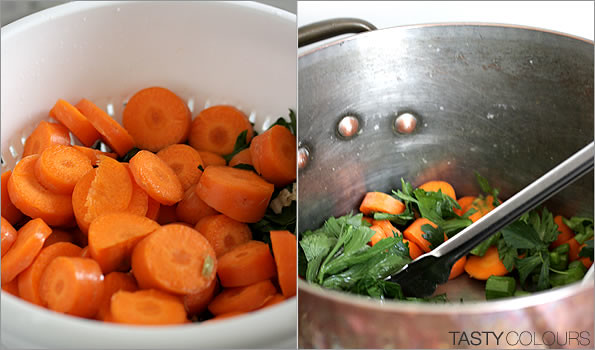
In the meantime, add slices of celery and carrot into the saucepan.


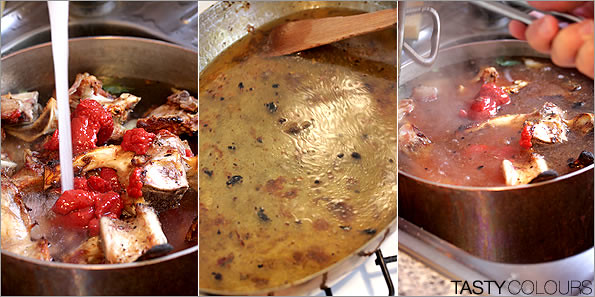
Then remove the roasting pan from the oven. Add onions and bones to the saucepan. Add tomato paste.
One important thing: the bones render some fat while roasting. Drain off as much of the fat as possible, using a sieve to catch the precious brown bits from the bottom of the pan. Do not throw away those brown bits! Pour some water into the roasting pan and deglaze it over heat by scraping all browning from the pan. Pour the liquid into the saucepan with bones and vegetables.


Fill the saucepan with cold water (about 5 cm above the level of the bones) and bring to a boil. Then reduce the heat to an absolute minimum, so it can simmer. It should simmer gently between 5 and 6 hours. Simmering does not stir up impurities in the way that a rolling boil would and keeps the stock clearer. The bones have to have enough time to give their full flavor. Occasionally, using a ladle, remove the impurities (mostly fat) which will rise to the top.


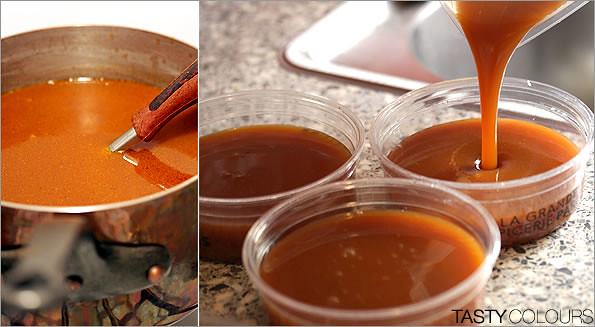
Using a ladle, strain the stock through a strainer set over a large bowl. Discard bones, vegetables and all other big solids. Then, using a “chinois” or a muslin, strain the stock once more, in order to get rid of smaller solids. Your stock is ready to use. It should have the brownish-cold color, similar to something between milk chocolate and caramel. At this stage, you can pour portions of the stock into plastic containers and freeze it, should you wish to use it later.


If you want to make demi-glace, apply the following instructions: pour the stock into a smaller saucepan and bring it to a boil. Once it is boiling, reduce the heat to a minimum. Simmer for about one hour - the cooking time will however depend on the thickness of the stock - sometimes you will need a bit less, sometimes more time. The best test to do is to pour a bit of stock into a cup and place it in the fridge. Once it thickens when cooled down, the stock is ready.  Occasionally, with a ladle, remove the foam which will form on the top.
Pour the veal stock into small plastic containers or ice cubes moulds. Once it is cooled down, freeze it and use it when needed.


Thursday, September 2, 2010

Food Festival in Gruczno

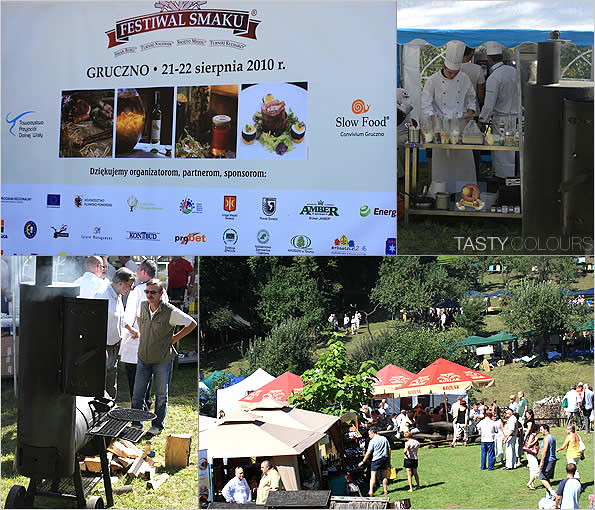
Forgive me for taking a long break in posting. The weekend before last, my husband and I went to the most renowned Food Festival in Poland, in the north of the country. And last weekend, we visited in Kraków the final session of the Małopolski Food Festival (“Festiwal Smaku”) – a food event for producers from the south of Poland. In the meantime, I have been bothered by an invalidating back pain and I had to reduce the sitting position to a minimum.

The Food Festival in Gruczno takes place every August.  This little town is located 500 km from Kraków, and about 100 km from the seaside. It probably is the largest and the most renowned festival of producers of artisanal and organic food products.

Food festivals have developed in Poland a few years ago only, thanks mostly to our membership to the European Union, which financially supports the development of regions. While the Małopolski Food Festival in Kraków is reserved for producers from the Małopolska region, the festival in Gruczno also welcomes producers from other regions, and for that reason it is more interesting. If you ever travel to northern Poland in August, try to visit this place. The best is to get there by car although driving in Poland is definitely not a pleasure (roads are rutted, people drive fast and aggressively). And while in Gruczno, you might as well visit the beautiful old town of Chełmno. Why not extend your visit to some of the biggest touristy attractions in the region: the city of Gdańsk, the Castle Museum in Malbork – one of the largest Middle Ages castles of the Teutonic Knights - around one hour of driving. Or Toruń – which is around 45 minutes of driving.


I had been hesitating to visit the festival for quite a while and we kind of decided to go there at the last minute. As we did not plan in advance where we could sleep, it was no surprise that the only “Chambre d’Hôtes” we found ad hoc was a stinky rat hole. I usually am not such a maniac as regards to sanitary conditions. But in this place, I was disgusted by the fact that sheets and pillow cases were not fresh. However, we arrived at 1 a.m. after 500 km of driving including 300 km in a huge traffic jam (it took us a total of 10 hours to get there). At that point, the physiological need to sleep was stronger than our will to find a more civilized and cleaner place. All in all, one can put a clean towel on a dirty pillow case and sleep well. The following morning, we got up very early and we arrived at the Festival as one of the first guests, a few hours before its official opening. Thanks to that I could have a few nice chats with several producers.

Around one hundred producers of organic or regional products from the whole country come to Gruczno. Some regions, like the North are better represented than the South or the East (they have their own food festivals). The producers encourage visitors to taste all their products – some of them quite famous, some of them forgotten or not so well known:

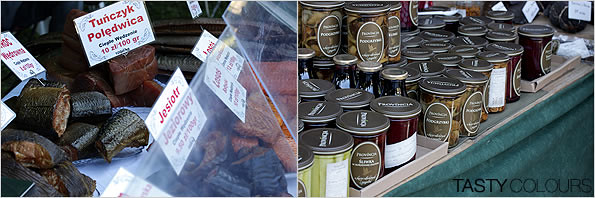
Hams (“szynki”), Sausages (“kiełbasy”), Kabanos (“kabanosy” – a thin and long sausage commonly made from pork, sometimes from other types of meat, including horse meat) and other charcuterie products made from pork (the most popular meat used for Polish charcuterie items). Besides pork, I tasted lamb and goat sausages - both interesting in taste (I have never seen them in any shops); Polish traditional charcuterie is cooked and smoked (not all foreigners like that particular smoked taste);


Półgęsek (“goose breast”) – an old dish made from boneless goose breast with the skin on, cured and slowly smoked in cold smoke. In some regions of Poland “półgęsek” was prepared from the whole goose carcass (without legs and wings). The dish was a luxury one, but in the 19th century became especially popular in the Northern region of Pomorze, where breeding of geese was popular. The texture is similar to raw ham; the characteristic taste of smoked, raw meat (similar duck breasts may be found in France). You will not find it in shops in Southern Poland. There is one place serving this Polish specialty abroad: the Polish restaurant in London, recently opened by the renowned Polish restaurateur, Adam Gessler. In Warsaw, you will find it in the restaurant “U Kucharzy.

Cheeses (“sery”) ; except for oscypek, bryndza and bundz (local and genuine cheeses from the south of Poland, which I already wrote about in my previous posts and fresh goat cheeses, one could find “korycińskie cheeses” (“sery korycińskie”). This cheese is a regional and traditional product from the east of Poland. Its name derives from a town called Korycin, located not far away from the famous Biebrza National Park. It is made from unpasteurized cow’s milk, with the addition of rennet. The cheese is harder than bundz, but its jangling texture is somehow similar. It is sold in large, round “loaves” of about 3 kg.  With maturity, it changes in taste, color and smell – for example, its texture, which initially is soft, becomes hard over time and its mild cream taste acquires a hint of salt over time.
Unlike bundz, koryciński cheeses are flavored with various herbs and spices. According to a local legend, the method of the cheese production was brought to the region by Swiss soldiers, engaged in the Polish Army during the Polish – Swedish War (“potop szwedzki”) in the 17th century. I further tasted cheeses from a few other producers who make hard cured cheeses of Italian or French styles. Amongst them, I met Rusłan Kozynko who produces cheeses that are close enough to a Parmiggiano, a Pecorino or a French Blue cheese (something between Roquefort and Bleu d”Auvergne).  All of them are worth mentioning and worth tasting as well, although I had a slight feeling that the blue cheese was overdone a bit. Their products, manufactured in Mazury (Northeast Poland) are available on the company’s website (vacuum packaging of the products allows for safe shipping).
I also visited the booths of two other renowned slow-food producers of hard cheeses. As far as I know, their products are available through their websites.


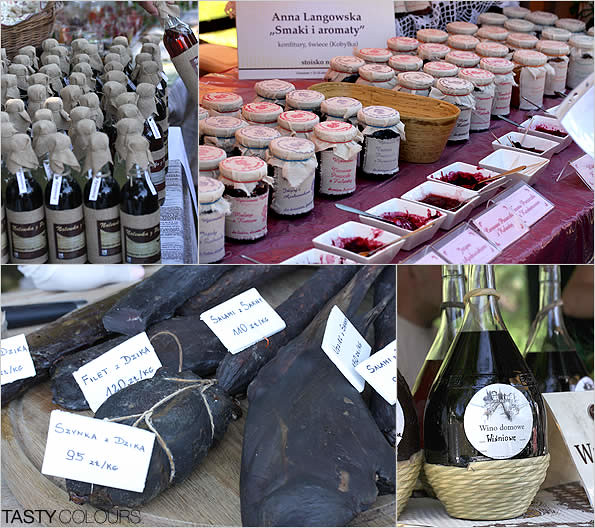
Powidl (“powidła”) – traditional plum preserves made from Polish plums, fried slowly over a bonfire in huge cauldrons; industrially made preserves are available in every food store; artisanal ones are not so easy to buy;

Fruit Preserves (“konfitury”) – very traditional ones as well as some with the addition of non typically Polish spices and flavors) (for example cardamom, amaretto); as well as naturally pressed fruit juices (“soki”) and fruit syrups (“syropy”);


Venison Charcuterie (“wędliny z dziczyzny”) – sausages and hams prepared from cured boar and roe deer meat. This type of charcuterie was more popular before the Second World War. The tradition to prepare it is reviving slowly now. Venison meat is easily available in food shops in Poland, but charcuterie made from it is very rare (the products are awfully expensive as for Polish conditions). I also found charcuterie (including raw sausages), made from ostrich meat – which my stomach had a difficult time to digest, and which are not extraordinary in taste (ostrich farms have been popular in Poland in recent years; but I am not an amateur of this bird’s meat as ostriches do eat anything including mobile phones and pens!).

Nalewka (Liqueur – correct me, if my translation is not proper); It is a general name for a traditional strong alcoholic beverage (usually around 40 %). It is prepared by maceration of herbs, fruits, spices, flowers, sugar, honey and so on. As opposed to regular liquors, “nalewka” usually is aged and must be stored for several weeks, months, or even years, before its final preparation. Very often its name is derived from its main ingredient (for example: apricots (“morelówka”), haw (“głogówka”), juniper (“jałowcówka”). The most renowned manufacturer of home-made “nalewskas”, Mr Hieronim Błażejak from Toruń, probably gained all possible prizes in various festivals. He invented 162 different flavours (what a pity that his webpage is in Polish only).


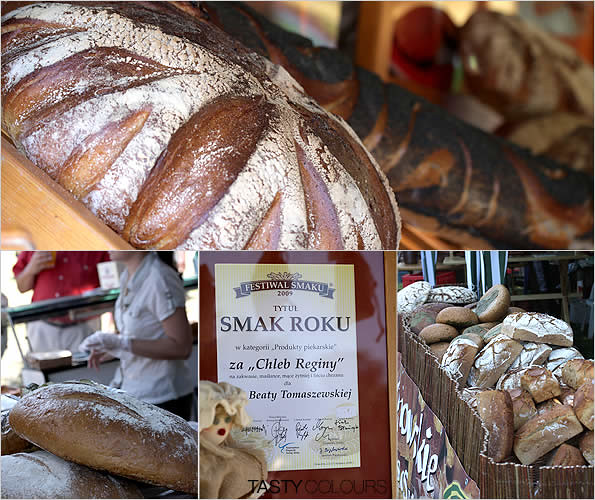
Breads (“pieczywo”; “chleby”): all possible types of organic wheat, spelt and rye breads; with the addition of spices, seeds and so on.


Pickles (“przetwory”) – omnipresent sour cucumbers and cabbage, but also pickled mushrooms (“grzybki marynowane”) – such as boletus, lactarius delicious, chanterelles; and other pickled vegetables;

Smoked fish (“wędzone ryby”) – Poland has a lot of lakes; the quality of soft water is unequal now, but there are still some clean lakes, rich with various types of fish. Warm smoking soft water fish have been popular in Poland for ages. Nowadays it is difficult to find good artisanal products like those I saw in Gruczno. This is true with many other products, of course. Distribution channels are weak, too, and in the south of Poland, Northern specialties are rare (in addition, small entrepreneurs cannot afford to have their products carried by big food store chains). Their smoked soft water fish like, for example, smoked eel, was excellent, full of flavor, not too salty and not too dry. On the contrary, smoked tuna and smoked tiger shrimps did not enslave my heart; the fish were awfully expensive (as far as I remember, around 20-25 euros per kilo);


Organic Oils, like, for example - Colza Oil or Linen Oil (the first one made by the Rutkowski family. For years, colza oil had a bad reputation in Poland, because in the eighties one could buy only refined modified oil, which was unhealthy. It is slowly changing nowadays. The oil is made from Polish non modified colza seeds and is rich in unsaturated fatty acids.  The linen oil, made by Krystyna just received a first place award in its category during the Festival.

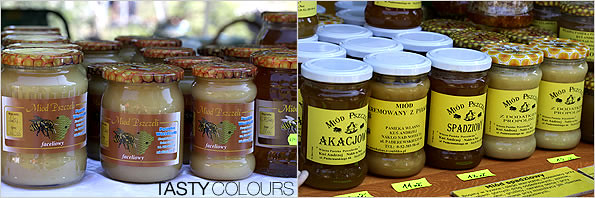
Organic Honeys (“miody”) from small apiaries from various types of local trees and flowers; traditional cakes, cookies and sweets; local fruits and vegetables;


Some exhibitors presented foreign organic wines, tea and cider from the Basque country or Greek products including halva (of which I am not a great fan).

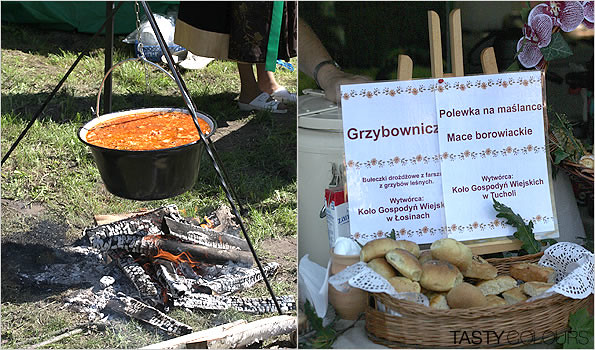
Aside from the products that were presented, one could also taste some regional dishes, such as: traditional dumplings, regional soups (for example, a type of sour cabbage soup from the Podhale region – “kwaśnica”; buttermilk soup; fried or marinated fish; baked potatoes with fillings; sausages, hunter’s stew – “bigos”, meats, including venison). Nevertheless, I can no longer look at the traditional, huge slices of bread spread with lard - pork’s fat (“smalec”) and topped with sour cucumber. This peasant, particular preparation despite the change of a political system, is still the king of food festivals!


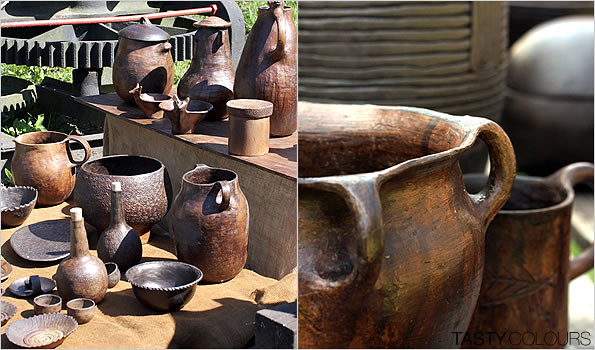
Finally, I was absolutely fascinated by Barbara Rożniak’s products. Her clay plates, pots, pans and jugs take you into the early Middle Ages. They are made using original methods from the Middle Ages, and for the purpose of rediscovering them, Barbara has visited numerous archeological sites.  She is regularly invited to many events in Poland and abroad.


Sunday, August 15, 2010

A Very Problematic Bean


One of my father’s summer culinary memories from his childhood is a very simple and rustic dish: young giant white beans cooked with slices of bacon and then served with fried onions and a lot of butter. Those beans are commonly called in Polish “fasola Jaś”.

It was not easy to find the English name for those beans. I raised the question on one Polish culinary forum to help me find a proper translation. Here are their suggestions:
- Butter Beans;
- Lima Beans;
- Broad Beans;
- Jack Beans;
- White Emergo Beans
- Giant Beans
- Jaś Karłowy Runner Bean
- Elephant Beans

It is not surprising that one can be lost in this nomenclatural mess, as Julia Child was lost while trying to find English equivalents for French names of fish when she had been working on her first book.
To make a long story short, following the Official Journal of the European Union, it seems that “Jaś Karłowy Runner Bean” (Phaseolus coccineusis the official English name.  It is a regional product, cultivated in southern Poland, in the Nida and Wisła lowland. Probably it still does not ring a bell. Thanks to readers of the Polish culinary forum, I found out that this type of local giant beans may be replaced, for example, by White Emergo Beans.

Those beans are very popular in Poland. One can buy them dry all year round in nearly every shop. They are white, oval, a bit flat, usually 2 to 3 cm long.  They contain a lot of protein, minerals (phosphorus and calcium) and vitamins.

On the opposite, young and fresh butter beans are available only in summer time, in August, and they are not so common, as opposed to dry ones. They are covered by a thin, white skin. Fresh seeds are light green. Their taste is not as floury as the one of dried white beans and you do not have to soak them in water, which is the reason that usually prevents me from preparing dishes with dried beans.

I am ashamed that, until last May, I had no idea that those beans were available fresh in the summer. Or rather my father should be ashamed, when he reproached me once: “And why don’t you cook fresh runner beans”? He asked. “What? Green runner beans? What are you talking about?” – I yelled. It was obvious that I had to find those beans once they would be in season. And here you have them.

This recipe is based on my grandma’s preparation, which was transmitted to me by my father. I served them with fried baby ceps (boletus), which appeared two weeks ago on a local food market. I could not refrain from adding some fresh thyme and grilling an extra 2 slices of bacon.

White “Jaś Karłowy” Runner Beans with Fried Ceps


300 g white fresh Jaś Karłowy Runner Beans (which you can replace with any other fresh white beans)
300 g fresh ceps (boletus)
Fresh thyme
3 shallots, peeled and finely chopped
1 big garlic clove, peeled and finely chopped
5 tablespoons butter
2 tablespoons olive oil
4 slices bacon
Salt
Pepper


Prepare the beans: place the beans and 2 slices of bacon in a saucepan and cover with water (1 cm above the level of beans). Add some salt and cook (under the cover) until soft, but not overcooked (depending on the size of the beans, between 30 minutes and one hour). You really have to taste them. Strain them. Discard cooked bacon or use it for another purpose.

Prepare the mushrooms: Delicately clean mushrooms from leftovers of the forest. Scratch the stems to remove soil. Rinse the mushrooms delicately under cold water. Cut some mushrooms in halves, should some of them be too big. They all should be about the same size, so they will fry evenly. In a hot frying pan, melt butter, add onions and cook over medium flame for 5 minutes. Add garlic and fry for another 3 to 4 minutes. Do not let onions and garlic burn. Add mushrooms into the frying pan and sauté them over medium flame until they release their juices and absorb them back in. In the meantime, in a small frying pan, grill slices of bacon until gold and crispy. Add thyme, salt and pepper generously, stir and add beans. Serve immediately with grilled bacon on top accompanied with slices of some good grilled bread.

Tuesday, August 10, 2010

Blog of the week Publication


I would like to share with you some good news. The Polish internet magazine “Ugotuj.to” (“Cook.that”) handles a cycle called “Blog of the Week”, designated to the presentation of Polish food blogs. Yesterday, it published a brief interview with me, where I present my blog, I share my opinions and ideas about Polish and French culinary traditions, as well as food habits of Parisians.

I also revealed some news concerning my first book about Polish culinary traditions, which should be published in English, after some further revisions and final work are completed, in a close future.  I also informed that I have been working for some time on a project about “Polish Food Days in Paris”, which – if everything goes well – should take place in Paris, at the fall of 2011, when Poland will held the Presidency of the European Union. I will be informing you about those coming events. 

I also would like to thank all of you who left warm comments after the interview!


or

Tuesday, August 3, 2010

Yellow, Yellow, Yellow


Do you remember that in my last post I was complaining that I did not have enough courage for cooking because of tropical temperatures? And now you know what? I came back to cooking, and this is mainly what this post is about.

August started which means that the season for all types of soil tomatoes finally started. We can actually enjoy these summer tomatoes only for two or three months a year.  The season is too short, but I dare to say that our local tomatoes are not worse than those from southern Europe. When I am in Krakow in the summertime, I always buy extraordinary ones, on the food market I my neighbourhood, from a nice woman, who, twice per week, sells tomatoes straight from her farm in various sizes, shapes and colours. When I come back to France by car, I always buy a crate of them. Not because they are cheaper than in Paris, but simply because they are delicious. A quintessence of tomato in a tomato. Skins which peel easily without blanching them in boiling water. Pulpy, juicy but not watery. Sweet.

This is nothing special for those, who have access to great organic food markets in NYC, London or Paris. But for me, who watches the changes in my country, the discovery of various types of tomatoes on a small provincial food market is a tiny proof that something has been changing in my country. I remember from my childhood only one type of plain, round red tomatoes. One could only dream about Lima or Buffalo, or cherry tomatoes.  Or yellow ones.

The leitmotiv for last Saturday’s lunch, which I prepared for my father, was the colour yellow. Soup, tart, pesto… The monotony of yellowness was slightly disturbed by “Bruschettas with Young Beans and Grilled Bacon”, as well as by “fried Chanterelles, Spinach and Parmiggiano”. There are the dishes:

Yellow Tomato Gazpacho


For my Gazpacho I used very ripe round yellow tomatoes and one grilled yellow bell pepper. The soup was quite sweet. I broke the sweetness by the addition of white wine vinegar, but I believe you can add more than indicated in the recipe. It was good, but not outstanding (or it is just a matter of taste).

Serves 4

Ingredients:
1 yellow bell pepper
1 slice of stale bread
150 ml chilled mineral water
700 g yellow tomatoes, blanched and peeled, seeds removed 
2 medium garlic cloves, peeled and chopped
1 handful of peeled almonds, sliced
6 nice basil leaves
½ half yellow onion, peeled and chopped 
1 small cucumber (max 100 g), washed, peeled and chopped  
Lemon zest of ¼ of small organic lemon
2 tablespoons lemon juice
3 tablespoons white wine vinegar
5 tablespoons olive oil
A pinch of powdered chili
Salt 
Pepper 

1. Preheat oven until 180° Celsius. Place your bell pepper on a baking sheet and bake it for about 30 to 40 minutes, or until its skin is well grilled and does not stick to the bell pepper anymore. Flip the bell pepper occasionally, so it will bake evenly. Remove the bell pepper from the oven, put into a plastic bag and let cool down. Then remove it from the bag, place it on a cutting board, and cut it along. Remove gently its stem, the seeds and peel the skin using a small and sharp kitchen knife.
2. In a small bowl, soak the bread in mineral water for a few minutes.
3. Put bell pepper, tomatoes, bread with its soaking water, garlic, onion, cucumber, basil lemon zest in your food processor or blender. Process the ingredients until smooth. Season with lemon juice, wine vinegar, olive oil, chili, salt and pepper.
4. Refrigerate for at least one hour before serving. You can add ice cubes right before serving.

Yellow Tomato Tart with Thyme


This tart may seem too simple at the first sight. For the filling, you only need ripe but firm tomatoes, fresh thyme, garlic and shallots. And that’s enough! You can add local goat or sheep’s cheese, but nothing more. I prefer the simplest savoury tarts with one or two ingredients – the onion tart Provencal style and this tomato are my favourite so far. The key is how you prepare this one ingredient. I like tarts, but except for Quiche Lorraine, I rather do not enjoy all those with heavy cream and eggs; usually, the sauce soaks into the dough; the dough becomes too heavy and too gluey, instead of crispy. I am also a maniac as regards the preparation of tomatoes. Except for some salads, I always peel them and I remove their seeds. I do not like all those pizzas and tarts, where seeds of freshly slices tomatoes drip into the dough, changing its texture into a chewing gum.  For this reason, I strongly recommend frying tomatoes for a while, before placing them in your tart mould. The excess of juices should evaporate if you want to enjoy the crispness of the bottom of the dough. 

I made this tart using home made pâte brisée, which I prepared a month ago and that I kept in my freezer. I used my husband’s recipe, coming from times when he was working as a pastry chef. Home made pâte brisée is not complicated; the only problematic action is to place the dough in the tart mould. It is just time consuming, but I assure that as long as you have a good recipe, the result has nothing to do with an industrial product.  

Ingredients

For the pâte brisée - makes 2 moulds: (18 cm and 24 cm) if rolled out quite finely. If you do not feel like to make your own dough, you can use ready industrial one, but I am not responsible for the final effect. 

200 g flour plus some more extra for your working table
1 teaspoon salt
125 butter, diced
1 large egg
1 tart mould (24 cm)
Baking beans

For the garnish:
700 g ripe but firm yellow Lima tomatoes, blanched, peeled, seeded; cut into quarters
5 tablespoons olive oil 
2 garlic cloves, peeled and finely chopped
2 shallots, peeled and finely chopped
1 tablespoon fresh thyme leaves
Salt
Pepper

1. Working with a small plastic pastry scraper (if unavailable with the tips of your fingers), combine quickly the flour, salt and butter, until you obtain a “sandy” texture. Add the egg and mix quickly and forms a ball.  If the dough is too dry, add a bit of cold water and mix (if you add too much water, then add a bit more flour). Do not overdo the dough or it will shrink during baking and it will be tougher than necessary.
2. Place the dough in the refrigerator for 2 hours (you can freeze the dough and use it later as well). 
3. Take the dough out of the fridge and roll it out on your working table. Make sure to always sprinkle enough flour between the table and the dough, and over the dough, to prevent it from getting stuck to the table or to the rolling pin. Use the rolling pin to place delicately the dough in the tart mould (I know that it is not easy, but even if the dough breaks a bit do not panic; just try to put the pieces together the best you can). Prick the dough with a fork, wrap the tart mould in plastic film and keep it in the fridge for about 15 minutes. Preheat the oven to 180° Celsius. Prepare a circle of baking paper, about 30 cm in diameter.
4. Take the dough out of the fridge. Remove the plastic film and place the baking paper on top of the dough; place baking beans over the paper (to prevent the dough from rising in the oven). Bake for about 15 minutes or until it gets slightly gold. Remove the dough from the oven. Let it cool down before removing the baking paper with the beans. Save the beans. Do not switch the oven off.
5. In the meantime, prepare the tomato garnish. Pour olive oil into into a hot saucepan. Add shallots, fry them for 5 minutes, then add garlic, fry for 2 or 3 minutes. Add tomatoes and fry them over high flame, mixing often, delicately (so they will not go to the pieces), for a maximum of 10 minutes.  And here’s one tricky thing. The frying time depends on your tomatoes. You should use ripe but firm tomatoes (Lima tomatoes are ideal). If they are too soft, they will give too much juices and will go into pieces while frying, and we do not want that to happen; on the other hand, they cannot be too cooked (the purpose of frying tomatoes is to get rid off the excess of water, which otherwise would go into the dough. You simply have to watch your tomatoes but if they gave a lot of juices, get rid of the liquid - do not add it to the tart –only add tomatoes! At the very end of frying, add salt, pepper and thyme leaves. Mix and place the totmatoes in the tart shell.
6. Place the tart in the oven and bake until the dough turns to a nice gold colour, and until tomatoes start to caramelize a bit (it should take about 20 to 25 minutes, but you really have to watch them). Remove the tart from the oven and serve hot. This tart tastes well both warm and at room temperature (this is how I served it to my father last Saturday). 


Fresh Corn Pesto (from Lottie & Doof).


As a main dish, I served Pappardelle with Fresh Corn Pesto. I rarely present on my blog dishes of other bloggers. It does not mean that I do not find ideas in culinary blogs. On the contrary, I find a lot of great ideas, and quite often I cook something from my favourite blogs. I do not present those dishes, as I think that the blog is a place to share your own culinary ideas. However, this Fresh Corn Pesto from Lottie + Doof is worth recommendation. Who would think of making a pesto from sweet corn? With grilled crispy bacon, it is absolutely delicious. Check out the recipe and try it. It is great.

Related Posts Plugin for WordPress, Blogger...